Digital art has taken on a new level with Photoshop, and with each new release of Adobe Photoshop, even the ability to produce more striking images with just a few clicks of a button. With Photoshop, you can instantly create an aged effect, add motion lines, color effects, glows, blurs, or make a photo look like a plan. Photoshop can also help many fun text effects to create a still photo, remove unwanted objects and elements of a scene. Include a number of excellent ways to spice up a blurred image to create special effects or to simulate motion and other ways to take advantage of Photoshop.


One of the simplest effects that you can use a photo in Photoshop changing color. This effect can be found under the Image tab in the Settings menu, the hue and saturation sliders. Click on the small box at the bottom of the window, you can use Hue slider to a uniform color in the image creation. This can be for creating large gray backgrounds behind a central figure. It can also help by trying to change the color scheme of an image to link to another.
If you have a picture of a white background and the shadows under the store (important for data in motion, especially those who jump), use the brightness of the image. To do this, use the magic lasso and Quick Mask tools to a number of areas to be selected.
Then use the float to a new layer of your choice, leaving the old one in place underneath. You can change the selection in the palette channel. Then drove away from the copy and create a new layer. (Using Layers in Photoshop is vital, so make sure to really take advantage of this feature). Press "Ctrl Alt (~)", lifted, we can choose the brightness of the picture, essentially brightness. However, we wanted the shadows, the opposite of brightness you want.
To do this, use the "Reverse" under the menu option. Create a new layer of the target by clicking. Fill the empty layer with black, with the selected inverse brightness. This ghost will appear, and the bottom layer will suddenly very dark, but it should not be confused with this. You can activate your copy now floating on your back, and put any background you choose after your number on a lower layer. The number and shadows appear above the new background.
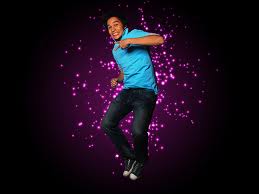
Domes are another feature of Photoshop that has unlimited possibilities. You can blur edges fog scenes, or simulate movement. Creating a motion blur effect, select your song and copy it to a new level. Now, at a lower level than that, with the option still apply, fill the selection with black or another color. You can use the Motion Blur filter from the menu "Filters for this option and lines of movement, without creating the figure in the layer above. Play with the distance and angle of motion blur to see what you look Make your image. You This filter can be combined with other results for different types of running lines.


You can use a soft-edged rectangular or boxy images using blur as well. In a vertical box "Tools" in Photoshop, select the upper tool called "Rectangular Marquee Tool". Click and drag your mouse to the image to a rectangle that is 5 to 10 pixels less than the actual image. Make sure you are equal distance on all four sides. Go to the menu bar and choose Select and then reverse. This option (or select) everything outside the rectangle you just created. Finally, go to your menu and select Filter, Blur, Gaussian Blur and type 1-15 pixels in the dialog.
Adding a shadow to a picture that is not one, just apply a layer style to the desired level of the image. This effect can be found under the Photoshop menu levels in all recent versions of the program. Simply drop shadow on the Layer Style icon and a small shadow on the selected color will appear under your selection. You can resize, transparency and color of the shadows fall tab Layer Style. You can also change the shadow effect by using the Blend Mode options in the drop box.
Two pictures can easily be merged in Photoshop. Drag the image below in more clicks and retention. You can use space in an image using the Canvas size operating under the View menu, if there is sufficient space. The dragged image is characterized as a layer above the original image.
No comments:
Post a Comment